Building and Working with a DIY Standing Desk
As with many previously office based desk-bound workers now working at home, I’ve found myself spending a greater proportion of my day sat down under the burden of hours of back-to-back meetings. It reached the point whereby my backside and the backs of my legs would be sore by the end of each day despite trying to make a conscious effort to move about regularly.
“It must be my chair” I thought. So, I spent some time researching various options from a crowdfunded chair which could transform and let me sit cross-legged to chairs which looked like they came straight out of a luxury fighter jet. Nothing which caught my eye was particularly cheap so I decided to try an orthopaedic cushion to add an extra layer to my existing office chair. It was relatively cheap compared to the outlay of a new chair, but I was hoping it would give me some insight into whether a new contact point for my bum would actually improve matters.
The results of my trial were that the cushion merely provided a different sitting experience, not necessarily an improved one. Fundamentally, I was still sitting in the same manner as I was before so I was still getting sore after an extended period.
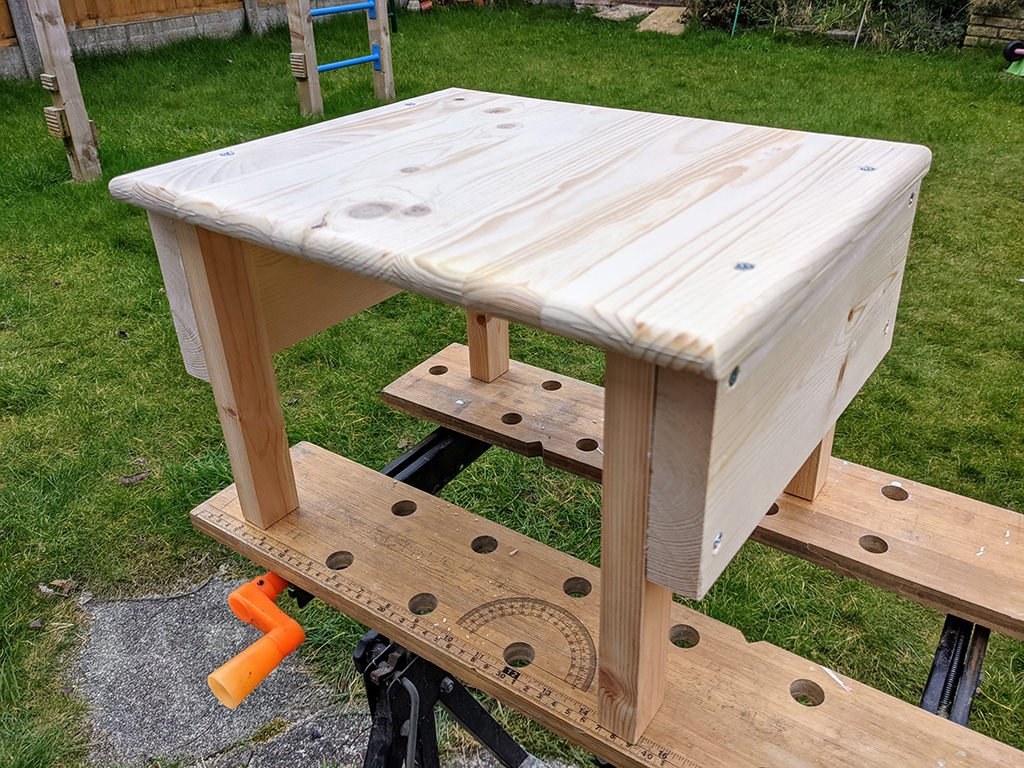
What I really needed was to get off my backside. So, having some spare timber laying around, I quickly put together a small table which would provide an elevated surface onto which I could place my work laptop and allow me to work whilst standing at my desk.

To be able to work comfortably whilst standing, there were two main considerations for me to factor in (there’s actually another, but more on that later): 1) having the keyboard at the height which would allow me to maintain a 90-degree angle at my elbows and 2) having my main screen at eye-level to prevent neck strain.
My mini-table was only going to provide the former because my laptop’s keyboard and screen are attached by a hinge, but looking down towards my primary screen wasn’t any different from before so the key difference I would be able to gauge was the transition from sitting to standing.
After my first week of working whilst standing, I noticed a big improvement; no sore backside or hamstrings at the end of the day! What I also noticed was that the new contact point between my feet and the floor was now a major (dis)comfort factor. This I was able to mitigate by standing on a cut-off piece of carpet and folded up yoga mat. Hard-soled slippers with arch support made the biggest difference in this area, but I’m also going to experiment with an anti-fatigue standing mat.
During this week, I alternated between periods of sitting and standing and I found this to be the optimum approach for maximum comfort.
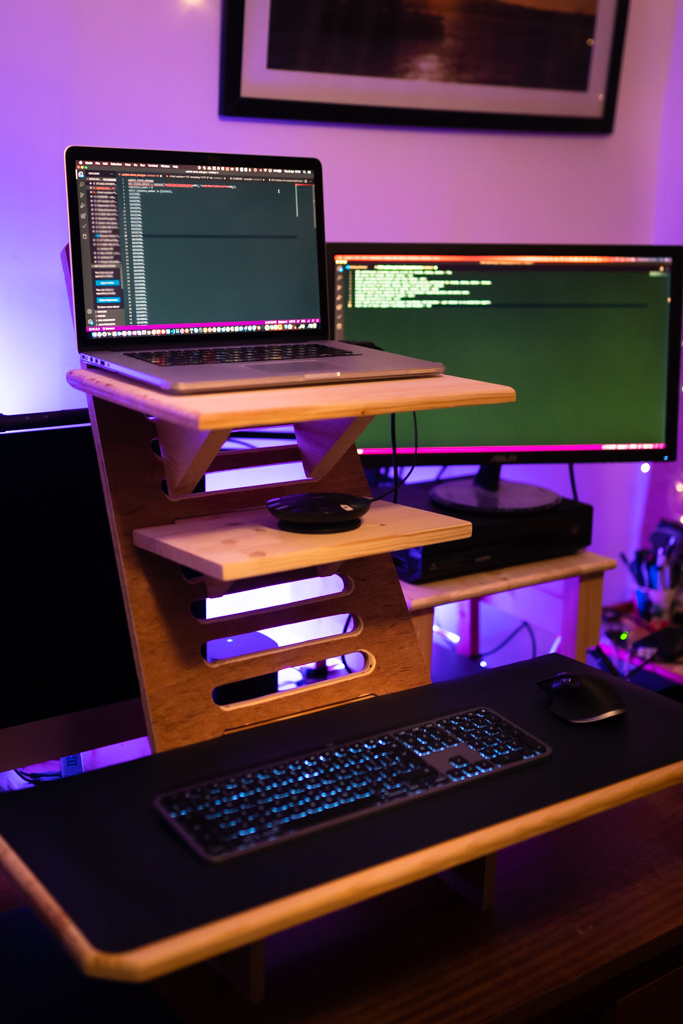
With the concept of working standing proven out I looked into standing desk solutions which would elevate my primary screen to eye-level as well as offering more surface area to work with. This would mean making use of a separate keyboard and pointing device whereas I’d always used the built-in keyboard and trackpad, but that in itself is a different story.
I didn’t want to replace my existing desk which is big, heavy and solid (it was £35 from an Oxfam shop and looks like it came straight out of a 1980’s office) so an electrically operated sit/stand solution was out of the question. I researched various standing desk riser solutions which seemed to vary in terms of stability, usable surface area and price. Some were almost as expensive as some of the chairs I’d looked at previously!
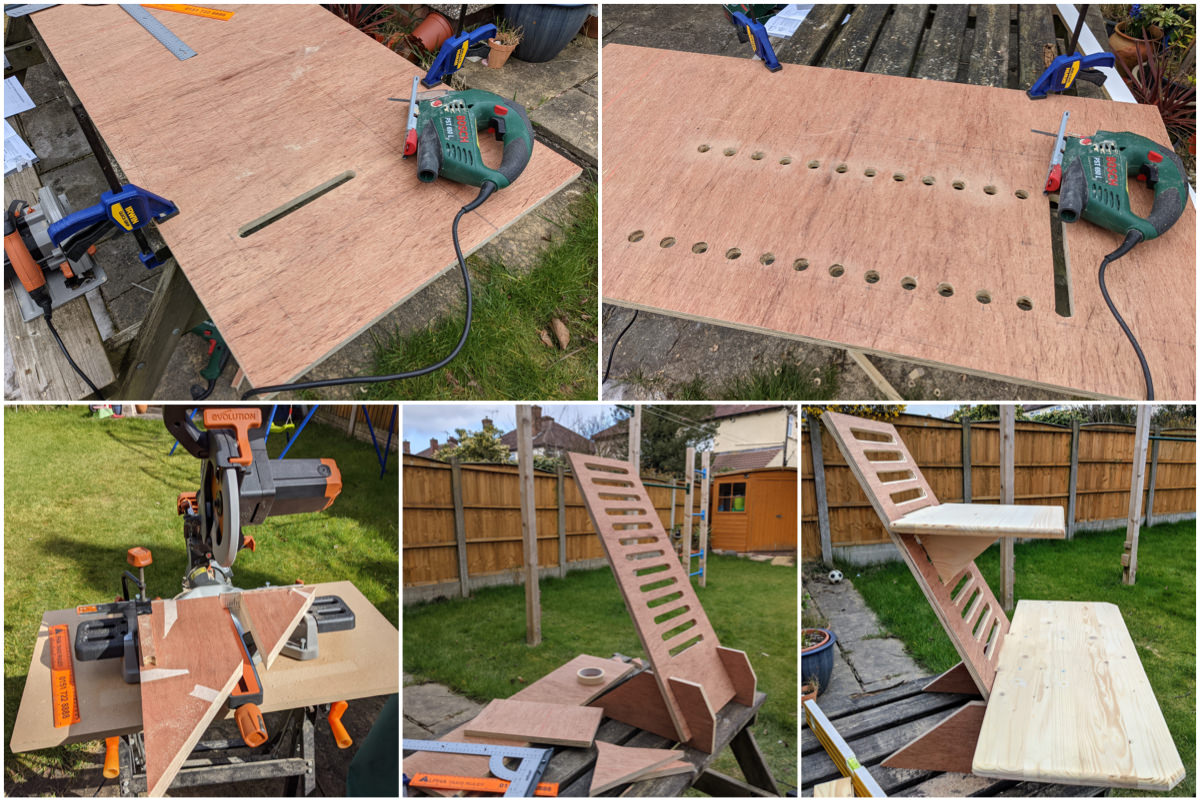
Once again, I had some spare timber laying around which I thought I could use to craft my own standing desk riser. How hard could it be? With some dimensions borrowed from pre-made risers I’d seen and a bit of trigonometry, I was able to build a riser which fit perfectly into the space I had, with enough usable space for all my things, was adjustable, and could break down into an almost flat-packable state to be stored away somewhere when not needed.

After 2 weeks with my new riser, I couldn’t be happier. Not only did I save a bit of money (I already had the tools and wood, your mileage may vary), but as somebody who enjoys woodworking I was able to spend a few hours doing something creative and get off backside.
